
Raspberry Pi
RPii - Getting Started
Contents |
GS.1 The Terminal
If you are completely new the to Raspberry Pi, then you may not know what 'the terminal' is, or how to use it. Using the terminal is necessary in order to download and install packages from the internet. If you are familiar with the terminal, feel free to skip this section and proceed to GS.2 Getting the Resources. If not, then the following section introduces the terminal, and all of the commands which are usful for following the rest of the libRPii documentation.
Before computers could do graphics like windows, all of the interaction with a computer was through the terminal. When the Raspberry Pi boots up, its default is to boot to the terminal. The terminal is where startx is called, and it is from the terminal that, by typing commands and pressing enter, programs can be written, run, and compiled. One of the easiest ways to change the timezone of the Raspberry Pi for example, is to type dpkg-reconfigure tzdata into the terminal. Other than writing source files, all other interaction with the RPii project is done in the terminal; it can be opened from an icon on the desktop of the GUI. Once the terminal is opened, typing the commands in table GS.1.1 will help you find your way around.
*If you log in using the standard login: pi, password: raspberry, then you will be logging in as a normal user. There exists a login for what is called the root user. The root user is like an administrator; by running commands as a root user, changes which normal users do not have permission to make can be allowed, e.g like installing new software.
GS.1.1 Navigating the Terminal
| Command | Arguments | Action |
|---|---|---|
| pwd | NA | Prints your current directory |
| ls | NA | List the content of your current working directory |
| cd | 'directory1' | Go down from your working directory to 'directory1' |
| '../' | Go up from your working directory | |
| ' ' (As in no argument) | Go to home directory | |
| TAB key | NA | Command line completion |
| ./ | 'filename1' | Execute the file 'filename1' in your current working directory |
| sudo | 'any other command' | Execute the command with *root permissions |
| mkdir | 'newdirectoryname' | Create a new directory called 'newdirectoryname' in the current working directory |
| apt-get | 'install packagename' | Search the debian servers for the package 'packagename' and install it if it exists. This command often needs to be run as root. (i.e use sudo apt-get install packagename) |
| ipython | --pylab | Starts the python shell, which is used to plot graphs among other things. Once in ipython, all of the above commands are still usable. |
| Ctrl+C | NA | When pressed on keyboard, this command kills the current program running. (This is a good way to end a program if it crashes when you run it) |
Exercise 1
Assuming that you are using the Raspbian OS, this exercise demonstrates how we can use the commands in table GS.1 to move around the directories, use the auto-complete function and run programs from the terminal.
- Open the terminal from the desktop icon. Type cd into the terminal and press enter. This will take you to your home directory, home/pi.
- Type ls to list the contents of the working directory. This shows all of the files that are saved in the working directory - which can be opened or run, and all of the directories which you can enter. Due to step 1, we are in the home/pi directory, and so the ls command has listed all of the other directories in home/pi. (This can be verified by comparing the list printed in the terminal, the that in the graphical file manager).
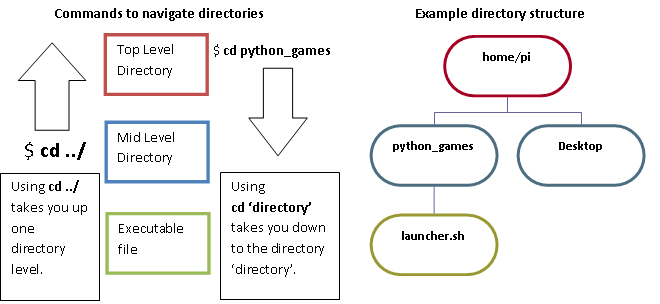
- Type cd python_games to change to the home/pi/python_games directory.
- Type cd ../ to return to the directory above python_games.See Fig GS.1 for a visual representation of this and the above step.
- Type cd p and then hit the TAB key. If python_games is the only directory beginning with the letter p in the current directory, then TAB will auto complete the command to cd python_games.If it is not, then pressing TAB twice in succession will list the available directories which start with p. So long as what is typed is unique in the directory, the TAB key can save a lot of time when typing long directory names. Enter the python_games directory.
- Typing pwd will show the directory you're in, known as the working directory.
- Finally, in this directory there is only one executable file, launcher.sh. By typing ./ followed by TAB, the auto-complete will do its job and execute the file. Feel free to explore these games, or exit and proceed to the next section.
Now that we have some experience of navigating the file system using the command line, we can move on to installing the libRPii resources.
GS.2 Getting the Resources
This section contains infomation about how to get the resources needed to use the content provided by the RPii project. The easiest way is if your Raspbeery Pi has access to the internet, however it is still possible (although a little more longwinded) to get the resources from a PC with internet access, and install the content manually. If at any point during this section things dont work as you may expect, see the troubleshooting section, GS.2.3
GS.2.1 With an RPi connected to the internet
If a Raspberry Pi can access the internet, then all of the necessary packages needed to support the libRPii resource can be downloaded easily. Before the packages can be downloaded, the Raspberry Pi needs to have the most recent package index. This achieved by running in the terminal:
(this may take up to 20mins depending on how recently the RPi was updated/how new its image is).
Table GS.1 included the apt-get install command. We will use this to download all of the packages we need in order to use the Wiimote, and RPii resources with the Raspberry Pi. The command allows us to download many packages at once - and there are many we need!
The code below is an example of how we would download the 3 packages: package1, package2 and package3
Table GS.2.1 contains all of the packages you will need. In addition, if you are new to your Raspberry Pi, you will also need a text editor - some reccomendations are shown in the table.
After installation, restart the RPi.
| Package Use | Package Name | Package Use | Package Name |
|---|---|---|---|
| Bluetooth | cwiid library | ||
| bluez | libcwiid1 | ||
| bluez-utils | libcwiid-dev | ||
| blueman | python-cwiid | ||
| libRPii Resources | Graph Plotting | ||
| rpii | python-matplotlib | ||
| rpii-dev | python-numpy | ||
| rpiimotionlogger | ipython | ||
| cwiid demos | Text Editors | ||
| lswm | scite | ||
| wminput | gedit |
Finally, to download the example sourcefiles used in the C tutorial section, and
the libRPii source files:
Once the Raspberry Pi has restarted, section GS.3 demonstrates how to start the wminput demo and the RPii Motion Logger application. Otherwise, depending on your interests you are now ready to look through the Teaching Resources, Learning C and Exploring libRPii sections.
GS.2.2 With an RPi that is not connected to the internet
This is not possible until a number of packages are included in the Raspbian distribution. In addition to those listed in Table GS 2.1, further packages are needed in order to be able to make and install the cwiid and RPii libraries manually. The following packages which are needed (in addition to those in table GS.2.1 excluding the libRPii and libCwiid packages) are in the table below:
| Package Use | Package Name | Package Use | Package Name |
|---|---|---|---|
| RPii installation | cwiid installation | ||
| autoconf | gawk | ||
| libtool | flex | ||
| bison | |||
| libbluetooth-dev | |||
| libgtk2.0-dev | |||
| python-dev |
Should the above packages be available the following instructions will allow us to add the libRPii and libCwiid packages to our RPi:
Installing the resources onto a RPi without an internet connection requires a memory stick, and another computer with internet access. In order to install the resources on a computer with internet access, download the following tarballs:
A tarball is very similar to a 'zip' file which you may be familiar of from using a windows OS. A tarball is a compressed folder which needs less memory to be stored than the original files. Before the contents of a tarball can be used, as with zip files, they need to be un-tarred.
- From http://packages.debian.org/source/wheezy/cwiid download the file cwiid_0.6.00+svn201.orig.tar.gz from the bottom of the page.
- Download the RPii tarball.
Save these tarballs in a folder of your choice on your (non-RPi) computer. Then extract the tar's by right clicking on each .tar file and selecting 'Extract here'.
Save the none tar files to a memory stick and transfer them into the home directory of your Raspberry Pi.
Finally, follow the instructions in each of the folders README files in order to install the resources to the RPi.
Note that the cwiid library must be installed before the RPii resources can be configured and installed.
GS.3 Exploring the Resources
This section rounds up the getting started section of documentation by verifying that the bluetooth dongle being used is compatible with the Raspberry Pi and by demonstrating how we can go about running some of the applications which come with the cwiid and RPii packages. The first is an application called wminput. This application allows us to use the Wiimote as a mouse. The RPii project does not take advantage of this functionality, but even so this demo application highlights some of the functionality made accessible by the cwiid library to experience programmers. The second is the RPii Motion Logger application. The application was written as part of the RPii project as explained in section H.3. This section explains how to use the RPii Motion Logger Application to record and plot acclerometer data. See the teaching resources section for more infomation about how this application can be used.
GS.3.1 Verifying hardware compatability
If the packages listed in section GS.2 have been succesfully installed, then this section will take us through a quick way to verify that all of the hardware - the bluetooth dongle, RPi and Wiimote are compatible.
- Insert the bluetooth dongle into the Raspberry Pi. If you have all of the bluetooth packages installed, then a bluetooth icon should appear by the computer time in the bottom right of the screen.
- Right click on the icon and left click 'devices'. This opens up a graphical bluetooth device manager.
- Click on search, and at the same time, press the buttons 1 and 2 on the Wiimote. If everything is working as it should, then you should see a Nintendo RVL-CNT-01 device show up in the devices list. If this does not appear, try again a few more times, and should it still not appear, go to the troubleshooting section.
- In addition, we can use the 'List Wiimotes' application provided by the cwiid package.
Within the terminal, type:
lswmand once again press 1 and 2 on the Wiimote simultaneously as prompted. If the cwiid library can see your Wiimotes (as will be required to use libRPii), then their MAC addresses will be printed to the terminal.
If all of the above steps are successful, then you can be confident that libcwiid and libRPii will be compatible with the hardware you are using.
GS.3.2 Wminput
Wminput is an application which demonstrates how the cwiid library allows the Wiimote to be used to control the mouse pointer. As the program is installed with the cwiid package, it may be run from any directory in the terminal by typing:
To control the mouse the program needs to access files used by the uinput driver. If these files could be accessed by any user then our computers would be very vulnerable to malicous software taking control of our mouse pointer. To prevent such uses, these files can only be accessed by the root user, and so the application must be run with the prefix sudo.
The application will then guide through how to connect the Wiimote. When it prints ready to the console, the mouse will be controlled by the Wiimote. To end the application, click in the terminal and press Ctrl+C.
The python games which come installed on the Raspberry Pi are a fun way to explore using the mouse. Even though these games run very slowly on the Pi, using the Wiimote to control games like Wormy or inkspill can make them more fun.
GS.3.3 RPii Motion Logger
GS.3.3.1 Running the Application
.csv stands for comma seperated value. These files contain each column of data between columns and each row on a new line. They are a very basic an common format and can be read by many other programs including MS Excel.The RPii Motion Logger allows the data from the wiimote to be saved to a text .csv file. These files can then be imported into Excel, or another program in order to plot graphs. Included in this project is a script which will run in Python on the Raspberry Pi, which will plot the output of the RPii Motion Logger. These graphs can be saved and analysed for motion time periods or acceleration magnitudes. The RPii Motion Logger Application and package have been written such that they are as easy to use as possible. Due to this, it can be run as simply as running the lswm or wminput applications. The stages of using the application are detailed below:
- The program RPiiMotionLogger is run from the terminal and is used to collect and
save the data from the Wiimote in a file. The filename is created automatically
and is saved in the working directory. This program has a simple interface which
prints instructions to the terminal and is controlled via the Wiimote. It allows
basic logging settings to be selected, Wiimote calibration and most importantly
logs the output from the accelerometers to a .csv file. As the RPii Motion Logger
is installed, it can be run from any working directory by typing:
RPiiMotionLogger(Dont forget to try using the TAB auto-complete feature)
-
The second part of the application is used to plot a graph of data in a .csv file. It is written in another programming language called python, but can still be run from the terminal. The name of the file which is to be plotted must be given to the program, however using the TAB auto-complete makes finding the file needed very simple. It is run from a python shell, and so as we should have downloaded the ipython package, we can run:
ipython --pylab
Once ipython has loaded, we first need to import the RPii python library:
import RPii
And finally to run the script to plot the data in the file "WiiData_DD-MM-YY_HH-MM-SS.csv", we execute:
(Note that the file we call must be in the working directory, we can use ls to check that it is in our current working directory)RPii.plotData("WiiData_DD-MM-YY_HH-MM-SS.csv")
In time, a figure should appear with a graph of each of the axes which was saved in the csv file.
In order to run the RPii Motion Logger Application to collect and plot data, only thee four above commands need to be called from the command line. This makes getting to grips with using the application very easy.
GS 3.3.2 The RPii Motion Logger Interface
This section introduces the RPiiMotionLogger interface. It is very simple and intuitive and so should be quick take When using the RPiiMotionLogger Application, the Controls are regularly printed to the screen showing:
| CONTROLS: | |
| Change Settings: | +&- |
| Calibrate Wiimote Acc Sensors: | 1&2 |
| Start Logging: | A |
| Stop Logging(if set): | B |
| Exit RPiiMotionLogger: | Home |
Below is a breakdown of each of the options:
- Change Settings: Pressing +&- simultaneously enters the Edit Settings mode. In this mode a second table of options are shown:
- TIME - Wiimote stops logging when the samples.LogDuration time limit is reached.
- SAMPLES - Wiimote stops logging when the samples.max sample limit is reached.
- BUTTONB - Wiimote only stops logging when the B button is pressed.
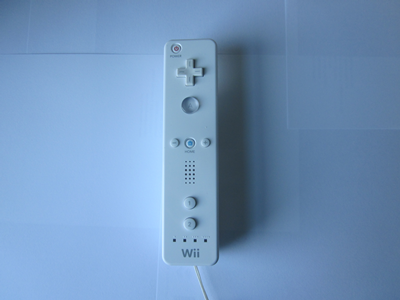
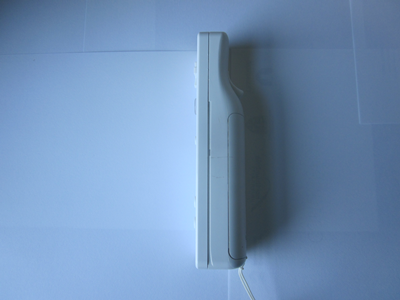
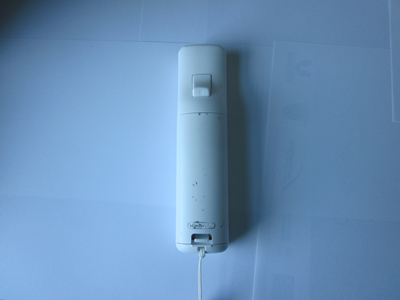
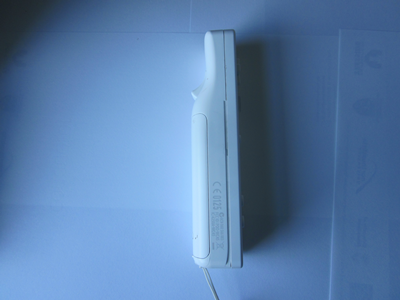
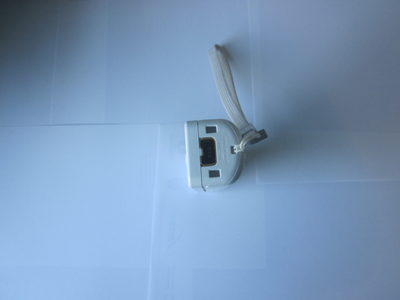
- Calibrate Wiimote ACC sensors: Pressing 1&2 simultaneously enters the Calibration mode. This involves rotating the Wiimote through 6 orientations in order for the output of the Wiimote sensors to be calibrated against gravity. The following table shows these positions.
- Start Logging: Pressing A when not in either of the Edit Settings
or Calibration modes will cause the Wiimote to start logging. The logging settings
used will be the last ones set in Edit Settings, or the default settings. The settings
will be displayed as the logging starts, along with estimated statistics (e.g sampling
time when Exit_type is samples). When the logging finishes, the file in which the
data was saved is printed, along with the number of samples taken, and length of
the logging.
- Stop Logging(if set): If Exit_type is set to BUTTONB, then the logging can be stopped at any time by pressing the B button on the back of the Wiimote.
- Exit RPiiMotionLogger: Pressing the Home button when not in either of the Edit Settings or Calibration modes will cause the RPiiMotionLogger application to terminate. If the Wiimote was in the process of logging, then the data is still saved to a file up to the point at which the application was terminated.
| Option | Wiimote Button(s) | Desciption |
|---|---|---|
| Toggle Exit_Type | UP |
Exit_Type refers to what triggers the Wiimote to stop logging. There are 3 settings:
|
| Toggle samples.max | RIGHT |
samples.max sets the no. of samples which will be collected before the Wimote stops
logging when Exit_type = SAMPLES.
Using the remote interface, the user is able to loop through settings of 10, 100, 1000 and 10000. |
| Toggle samples.wait | DOWN |
samples.wait sets the amount of milli seconds between each sample. This is equivalent
to the reciprocal of the sampling frequency. The Wiimote has a sampling limit of
100Hz and so the smallest value of samples.wait is 10ms. Using the remote interface, the user is able to loop through settings of 10ms, 100ms and 1000ms. |
| Toggle samples.LogDuration | LEFT |
samples.LogDuration sets how many seconds the Wimote will log for beofe it stops
when Exit_type = TIME.
Using the remote interface, the user is able to loop through settings of 15s, 30s, 45s and 60s. |
| Toggle ACC axes | 1 or 2 |
The Wiimote can be set to log any combination of the 3 axes. Button 1 moves forwards through the list of options. Button 2 moves backwards through the list of options. |
| Save and Exit: | +&- | Pressing +&- simultaneously will save the new settings and will exit the Edit Settings mode. |
| Position | Axis Down | Image | Position | Axis Down | Image |
|---|---|---|---|---|---|
| 0 | -Z |
|
1 | +X |
|
| 2 | +Z |
|
3 | -X |
|
| 4 | +Y |

|
5 | -Y |
|
GS 3.3.3 Plotting the csv files
Once data files have been saved, plotting the files couldnt be easier. By following section 'GS 3.3.1 Running the application' the Raspberry Pi will automatically plot the relevant no. of graphs from the csv file that is given as an argument. Below are some tips on using ipython and what we can do with the graph:
- The ipython environment is called a python shell. Unlike in C, to run a program in python we do not need to compile our source files, instead we import them directly. The nice thing about the ipython shell in particular is that we can still navigate the directories as we would in the terminal, and most of the commands given in GS 1.1 Navigating the terminal like cd, ls and mkdir can still be used. This means we can easily navigate to the directory in which we have saved our data files from the Wiimote.
- The filenames of the data files currently saved by the RPiiMotionLogger are very long. The numbers represent a timestamp, and this technique is used to ensure that each filename is unique. Even with the TAB auto-complete functionality of ipython, typing these filenames into the RPii.plotdata function can be prone to errors - so feel free to change the filenames to something more memorable and simpler.
- The matplotlib library, which is used to produce the plots has usful functinos built in. We can save our images, pan and zoom, letting us save the images to a memory stick so that we can print them, or use them in presentations. The bottom right of the figure which contains the graph gives the values of the pointer location on the x and y axes. These can be used to find the times and amplitudes of each peak of the graphs - and are a great starting point when comparing theoretical predictions and experimental results.
- The matplotlib library is a powerful tool for plotting data. The matplotlib website has a lot of useful documentation about how to add extra features to your graphs. For example we could write scripts to add arrows and labels to parts of the graph or to find and display the distance between subsequent peaks. This project has not included any documentation on how to extend the RPii script as the matplotlib website is very accessible and useful.
GS.4 Section Summary
The above content should be sufficient to allow students or teachers to get to the point whereby they can use the RPii Motion Logger application as a resource to explore physics. In further editions of libRPii, the IR functionality of the cwiid library will be supported, allowing the Wiimote to be used as a light gate in other experiments.
Depending on your interests, you are now in a position to explore the remaining
sections of documentation.
For students or teachers interested in learning how to program in C see the
C Tutorial.