Near Field Communication
Difficulty: advanced
This tutorial will have you make a coil for NFC and connect it up to your Pi. It will then teach you how to send and receive messages through your coil to give your Pis/robots a new way to communicate.
REQUIREMENTS:
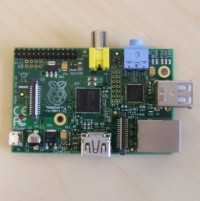 Raspberry Pi
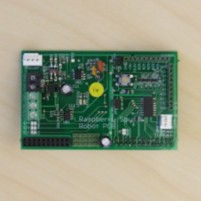 Custom Pi shield
-
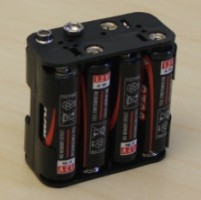 Battery pack
 -
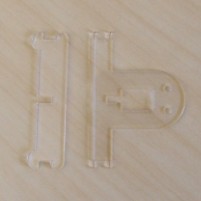 Coil holder
 -
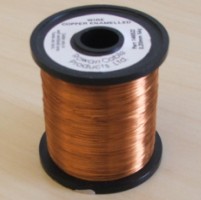 Enamelled wire
 -
 Sandpaper
You will probably also want to find another person doing this tutorial or a spare robot so you can test both sending and receiving messages.
THEORY:
NFC is a simple form of wireless communication. On the sending side we have a coil of wire connected through a transistor/OP-AMP so that we can push large amounts of current through it. Using the general purpose clock we can drive this at 64 KHz (a frequency that our circuits are tuned for). This means that we are very rapidly (64000 times a second) turning the coil on and off. This means there is an alternating current going through our coil of wire which in turn creates a rapidly changing magnetic field. When a second coil (the receiving side) is brought close, its wire is being “cut” by this magnetic field as it changes and so a current is induced in the receiving coil. Our shield then contains a tuning, amplifying and envelope detection circuit. This will boost any signal received at 64KHz and then change it to an on/off signal that can be read by the GPIO pins (presence of 64KHz is on, absence is off). Schematics are available for those interested.
So with a coil connected either side it means that we can send and detect 64 KHz signals. If we actually want to send some more meaningful data we’ll then have to put another protocol layer on top of this.
This leaves us with a few extra choices to make, the first of these is to choose a clock rate for our data. We want to avoid the 64 KHz range as this will simply be enveloped, we also don’t want to go higher as the Pi’s GPIO pins won’t be able to keep up. The sensible range is therefore a low one which won’t be filtered out and is easy for the Pi to keep up with. We won’t be sending a lot of data and so to ensure that we have lots of slack so that our timing isn’t too critical (important as we’re using a slow interpreted language and Linux rather than a real-time operating system), so a clock rate of about 10 Hz seems appropriate. You might like to see if you can get it running faster after you’ve got it working.
Next we have to choose the protocol for data itself. There are many choices you can make here, if you only have a few messages you’ll ever want to send you can come up with custom binary opcodes for each, this would allow you to give as much difference as possible between them (a large Hamming distance) so that the chance of miscommunication is limited. You could otherwise set up protocols including error-checking (for example extra bit for parity or CRC). It would even be possible to use serial RS232 at a very low baud rate. If you’ve done the morse code on an LED tutorial, then you’re most of the way to being able to send sentences over NFC.
INSTRUCTIONS:
First you’ll need to make the coil. You’ll need about 5m of enamelled wire. The fact it’s enamelled means that it can remain very thin whilst still being insulated, allowing more turns of the coil and so a stronger magnetic field being produced.
Wind you coil around the holder for your robot; about 30 turns should be sufficient. Try to keep the coil tight. Make sure that you have enough wire on each end to still connect it to your Pi. You may find it useful to use a small piece of tape to stop the wire uncoiling.
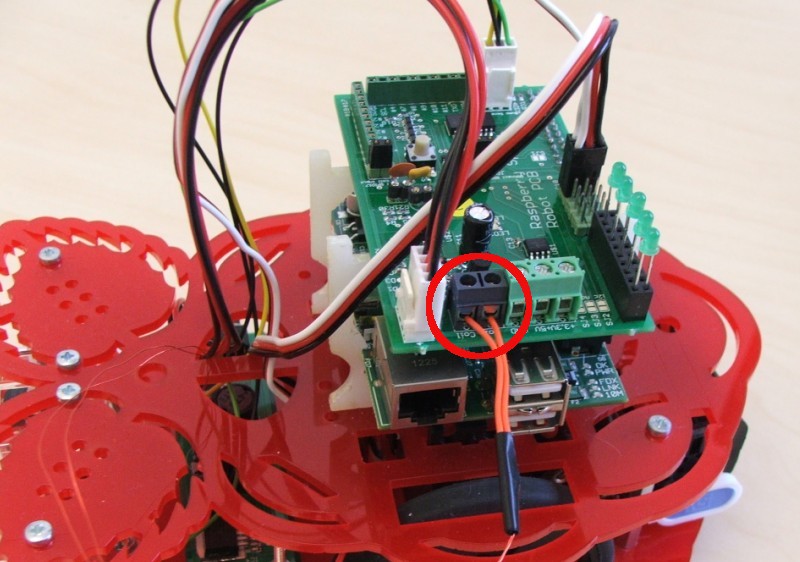
Using the sandpaper, strip insulation off the wire at each end so that it can be electrically connected to the Pi. Now screw the ends of the wire into the points on the shield labelled “Coil”. It doesn’t matter which way round the two ends are, but make sure that they are not touching each other – you don’t want to create a short circuit. In this photo, the ends of the wire have been connected to lengths of insulated wire to avoid short-circuiting.
You may like to mount your coil on the front of a robot chassis, so it looks something like this:

Decide with your partner whether you’d like to try to implement both sending and receiving individually before testing, want to work together on the code, do one each, etc. We’ll show how to send a binary string or Morse code messages – decide if you want to use a different protocol.
SENDING:
Open up a Python console (as root since we’re using GPIO).
sudo python
Now in the console let’s import the necessary libraries and send a 1 second pulse.
import RPi.GPIO as GPIO
import time
GPIO.setmode(GPIO.BCM)
#set the alternate mode for pin 4 (GPCLK0)
GPIO.setup(4,GPIO.ALT0)
#set the clock frequency to 64 Khz)
GPIO.setclock(4,64000)
#turn on the clock
GPIO.output(4,1)
#pause 1 second then turn off
time.sleep(1)
GPIO.output(4,0)
Now we know how to send a simple pulse try to write a script which takes a binary string and transmits it at 10 Hz. We recommend you add a 1 before any message to signal the start and a 1 at the end followed by 0s for 1 second. We’ll also split up any data into bytes (padding with 0s at the end, so be sure to send whole bytes), this should give us almost 0.5 byte/s speed!
To send Morse code will require only minor modifications to the LED script, so have a go if you like.
RECEIVING:
Open up a Python console as root.
sudo python
Checking whether you are being sent a 1 or 0 at any one time is easy.
import RPi.GPIO as GPIO
import time
GPIO.setmode(GPIO.BCM)
GPIO.setup(17, GPIO.IN)
while True:
  print(GPIO.input(17))
  time.sleep(0.1)
This will print out the current state of the coil 10 times per second: if it is being sent a signal it will print “True”, otherwise it will print “False”.
Actually receiving a message is a bit harder however, this is because we have to make sure the timing is right, this is very easy when we have another clock signal at the transmission rate as we can just check at the rising clock edges. However, as we lack this we have to try to get the timing information from the data transmission itself. This is why we made sure to always send a high bit to start and stop every byte.
When we receive the first high signal we can then listen every 0.1 seconds after that to get each bit. We then know we should be receiving a high bit for the 9th. If we don’t, we know that there has been some sort of error – either loss of transmission or mistiming, so the byte is invalid. If we do receive the last bit then we can go back to listening for a start bit again, but be sure to wait 0.1s so that we don’t read the end again as the start!
Because there will be some noise in the system we may sometimes read a 1 or 0 when the other was sent. To try to minimise errors further try taking about 5 readings for each period and assume whichever there are more of is the correct value. (Try just adding up the inputs and checking if >3.)
Try and write this script. Test it out with your partner to see if you can communicate.
As you can send bytes, converting ASCII to binary and back is quite straight forward.
bin(ord('a'))
gives you the integer for the character ‘a’ then converts it to binary giving you ‘0b1100001’.
bin(ord('a')).lstrip('0b')
will therefore give you just ‘1100001’. As this is only 7 bits you would want to pad with 0s on the left to make up to 8 before trying to send. Note that not all characters will be 7 bits.
An easy way to pad up to 8 bits with 0s on the left is
bin(ord('a')).lstrip('0b').zfill(8)
To convert back:
chr(int('1100001',2))
converts the binary string to an int (explicitly saying it has base 2) then the int to a character.
You could also try receiving the Morse code and using this to drive an LED. This can be done with a simple loop - have a go. For a bit more of a challenge, try to also decode it.
Example programs: NFC_send.py, NFC_receive.py, morsecode_send.py, morsecode_receive.py
EXTENSION: Secret Messages
Sending a message on an LED works, but allows anyone within sight to intercept and read your message. Using NFC means that the message can only be received within a very controlled region.
Try using the blob detection tutorial to automatically align two robots so that they can exchange messages without anyone else knowing what the messages are.
