Basic Image Processing
Difficulty: beginner
This tutorial aims to be a basic introduction to image processing with the Raspberry Pi and Python. We will write a Python script to grab webcam images, which we will then alter and display. In later tutorials we will look at more complicated functionality, and the use of more peripherals and a robot.
REQUIREMENTS:
-
 Webcam
 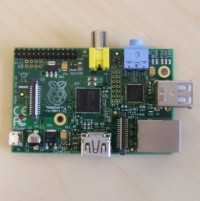 Raspberry Pi
You may also need an Internet connection in order to download libraries.
INSTRUCTIONS:
If you are not using one of our SD cards or images, then please install our custom libraries.
To begin the tutorial, start up a text editor and create a new file called “basic.py”; we will use this script as a test bed to try out the image processing library. Alternatively, you can use the interactive Python environment to test the code as you go along.
The first thing our Python script needs to do is import the image processing library. So enter
from imgproc import *
at the top of the script or into a interactive Python session. This loads and sets up the library read for use.
The imgproc module provides us some basic functionality to use a webcam, access image data and display images on screen, as well as some higher level image processing functions we will use later.
We’ll begin by opening the camera device. Enter this next, on the next line beneath the import statement
my_camera = Camera(320, 240)
This opens the camera device, setting the size of the captured images to 320 pixels width by 240 high.
On its own this statement doesn’t do a great deal: we’ve opened a Camera but don’t actually do anything with it, so let’s grab an image from the camera and store it.
my_image = my_camera.grabImage()
Now we have an image, so as a final step let’s display it on screen. First we must open a viewer window, and then we need to tell the viewer to display the image we capture. Finally we add a delay, to give us time to see the image (not necessary from the interactive session).
# open a view setting the view to the size of the captured image
my_view = Viewer(my_image.width, my_image.height, "Basic image processing")

# display the image on the screen
my_view.displayImage(my_image)

# wait for 5 seconds, so we can see the changes
waitTime(5000)
Your complete code should now look like this:
from imgproc import *

# open the webcam
my_camera = Camera(320, 240)
# grab an image from the camera
my_image = my_camera.grabImage()

# open a view, setting the view to the size of the captured image
my_view = Viewer(my_image.width, my_image.height, "Basic image processing")

# display the image on the screen
my_view.displayImage(my_image)

# wait for 5 seconds, so we can see the image
waitTime(5000)
Now run your code from the terminal with the command
python basic.py
There will be a delay as the camera loads up and grabs an image. Afterwards you should see the image appear in a new window.
Now we have the basic setup, we can start playing with the image data.
The image data is a 2 dimensional array of pixels, and each pixel is a tuple of 3 values: the relative intensity of the red, green and blue colours in the range 0 to 255 (inclusive). You can access a given pixel in the image by treating the image as an array, and by providing a tuple of the x and y position of the pixel.
# get the value of the pixel at x position 120 and y position 64 in the image
pixel = my_image[120, 64]
# pixel is now a tuple of the red, green and blue of the requested pixel

# An alternative method
red, green, blue = my_image[120, 64]
# red, green and blue now contain the intensity of the red, green and blue
# channels respectively
To set the value of a pixel, you assign a 3-tuple to the position, beware you can only set values to between 0 and 255 (inclusive).
# Set the value of pixel at x position 120 and y position 64
# to an orange colour
my_image[120, 64] = 255, 128, 0
Now as a use of this functionality, we will take every predominantly red pixel in the image and change it to blue. Here is some commented Python code which will do this.
# iterate over ever pixel in the image by iterating over each row and each column
for x in range(0, my_image.width):
  for y in range(0, my_image.height):
    # get the value of the current pixel
    red, green, blue = my_image[x, y]

    # check if the red intensity is greater than the green
    if red > green:
      # check if red is also more intense than blue
      if red > blue:
      # this pixel is predominantly red
      # let's set it to blue
      my_image[x, y] = 0, 0, 255
To run this code, place it in the script after we grab the image from the camera. Make sure you also put it before the image is displayed to the screen, otherwise it will only be altered after it has already been copied to the display.
This signals the end of this first basic tutorial. From here you may like to move onto the more advanced tutorials, or experiment with the code you have. There is also a listing of all of the functions in the Python module, if you just want to play around. The interactive interpreter is a good way to get familiar with the functions.
Keep in mind when accessing pixels that you need to grab an image from the camera before using it, and if you set the colour of pixels, you need to display the image afterwards to see the change on screen.
