
Raspberry Pi
Downloads
This page contains download links for the GNU toolchains, as well as the model answers to each lesson.
Contents |
1 GNU Toolchain
1.1 Microsoft Windows
For Microsoft Windows, I use the YAGARTO and MinGW packages.
Please visit the YAGARTO website and download and install YAGARTO Tools and YAGARTO GNU ARM toolchain for Windows. MinGW can be downloaded from here. You may need to restart your computer for this to work (honestly).
Note: YAGARTO must be installed to a path with no spaces, e.g. 'C:\YAGARTO\' not 'C:\Program Files\YAGARTO\'.
1.2 Mac OS X
For Mac OS X, I use the YAGARTO packages.
Please visit the YAGARTO website and download and install YAGARTO GNU ARM toolchain for Mac OS X.
1.3 Linux
There are a number of options for getting the GNU ARM toolchain on Linux.
1.3.1 Prebuilt
You can download a prebuilt toolchain using the following commands:
$ wget http://www.cl.cam.ac.uk/freshers/raspberrypi/tutorials/os/downloads/arm-none-eabi.tar.bz2
--2012-08-16 18:26:29--  http://www.cl.cam.ac.uk/freshers/raspberrypi/tutorials/os/downloads/arm-none-eabi.tar.bz2
Resolving www.cl.cam.ac.uk (www.cl.cam.ac.uk)... 128.232.0.20, 2001:630:212:267::80:14
Connecting to www.cl.cam.ac.uk (www.cl.cam.ac.uk)|128.232.0.20|:80... connected.
HTTP request sent, awaiting response... 200 OK
Length: 32108070 (31M) [application/x-bzip2]
Saving to: `arm-none-eabi.tar.bz2'

100%[======================================>] 32,108,070   668K/s   in 67s

2012-08-16 18:27:39 (467 KB/s) - `arm-none-eabi.tar.bz2' saved [32108070/32108070]

$ tar xjvf arm-none-eabi.tar.bz2
arm-2008q3/arm-none-eabi/
arm-2008q3/arm-none-eabi/lib/
arm-2008q3/arm-none-eabi/lib/libsupc++.a
arm-2008q3/arm-none-eabi/lib/libcs3arm.a
...
arm-2008q3/share/doc/arm-arm-none-eabi/info/gprof.info
arm-2008q3/share/doc/arm-arm-none-eabi/info/cppinternals.info
arm-2008q3/share/doc/arm-arm-none-eabi/LICENSE.txt

$ export PATH=$PATH:$HOME/arm-2008q3/bin
1.3.2 apt-get
Some Linux distributions including Ubunutu offer the ARM GNU Toolchain via apt-get. Run the following command:
$ sudo apt-get install gcc-arm-none-eabi
1.3.3 Build from source
Linux users may wish to build their own cross-compiler toolchain. This will require downloading and building the binutils and gcc packages from GNU. The binutils package contains the basic tools for building executables, including the assembler, the linker, a disassembler, and tools to manipulate object and binary files. These two packages are built separately but should be installed into the same destination directory. Make an area in your home directory to build your development kit.
$ cd
$ mkdir devkit
$ mkdir devkit-build
$ cd devkit-build
Download the binutils-X.XX.tar.bz2 package from GNU binutils into the devkit-build directory and uncompress it with the tar jxv binutils-X.XX.tar.bz2 command. Replace the X.XX with the current version number, such as 2.24 or 2.25 which have both been used successfully for this course. A note about make commands: if your development system has multiple processors or cores, you can use then to build and compile in parallel by adding -j #cores A note about the --program-prefix option: the trailing dash (-) is necessary to make sure the command names match helper templates used later in the course. Build the tools with these steps, replacing X.XX with your specific binutils version number:
$ cd $HOME/devkit-build
$ mkdir binutils-build
$ cd binutils-build
$ ../binutils-X.XX/configure --prefix=$HOME/devkit/ \
--program-prefix=arm-none-eabi- --target=arm-none-eabi --disable-nls
$ make
$ make check
$ make install
$ cd ..
The gcc package contains a C compiler. Download the gcc-X.XX.tar.bz2 package from GCC, The GNU Compiler Collection into the devkit-build directory and uncompress it with the tar jxv gcc-X.XX.tar.bz2 command. Replace the X.XX with the current version number, such as 4.8.2 or 5.1 which have both been used successfully for this course. Build the tools with these steps, replacing X.XX with your specific gcc version number, and add the -j #cores option, if desired
$ cd $HOME/devkit-build
$ mkdir gcc-build
$ cd gcc-build
$ ../gcc-X.XX/configure --prefix=$HOME/devkit/ \
--program-prefix=arm-none-eabi- --target=arm-none-eabi --disable-nls \
--without-headers --with-newlib --with-as=$HOME/devkit/bin/arm-none-eabi-as \
--with-ld=$HOME/devkit/bin/arm-none-eabi-ld --enable-languages=c
$ make all-gcc
$ make check all-gcc
$ make install-gcc
$ make all-target-libgcc
$ make check all-target-libgcc
$ make install-target-libgcc
$ cd ..
Now that you have a custom cross-compiler in your $HOME/devkit directory, you will need to add this directory to your shell's PATH environment variable to be able to run the tools later in the course. Each time you are ready to use the toolchain, run the following shell command:
$ export PATH=$PATH:$HOME/devkit/bin
2 OS Template
The OS Template file is one I have created which contains enough instructions for the compiler to create a basic Operating System for the Raspberry Pi. It contains no actual assembly code, just a Makefile script and a Linker script.
Download Template for USB Operating System.
3 Lesson Solutions
3.1 Lesson 1: OK01
3.2 Lesson 2: OK02
3.3 Lesson 3: OK03
3.4 Lesson 4: OK04
3.5 Lesson 5: OK05
3.6 Lesson 6: Screen01
3.7 Lesson 7: Screen02
3.8 Lesson 8: Screen03
3.9 Lesson 9: Screen04
3.10 Lesson 10: Input01
3.11 Lesson 11: Input02
4 Example Operating Systems
Here are some example operating systems for you to learn from. If you've coded an operating system that you think others could benefit from, please email me at [Javascript required].
| Name | Author | Description |
|---|---|---|
| Coloured CLI | Alex Chadwick | This example is a small extension to Input01, featuring a coloured text terminal, rather than a black and white one. Special characters are used to change the colour. |
| Pascal OSs | Marten van der Honing | A few small OSs written is Pascal based on this course, and beyond. |
5 Fonts
Below are some fonts for you to use in your Operating Systems.
5.1 Monospace, Monochrome 8x16
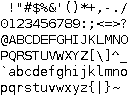
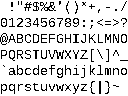
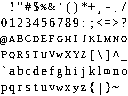
These fonts are the simplest ones available. They use a 1 to represent a white pixel, a 0 to represent a black pixel, and having representations for the first 128 ASCII characters. The use 16 bytes per character, arranged such that each byte is one complete row, going right to left with higher bits, going top to bottom with later bytes.
The tutorial used to suggest these fonts were stored in the opposite direction along the rows. The lowest bit is the rightmost pixel, the highest bit is the leftmost.
| Font | Image | License |
|---|---|---|
| Monospace Default |
|
Free to use/redistribute commercially. Cannot be titled 'Bitstream' or 'Vera'. |
| Liberation Mono |
|
SIL Open Font License. |
| Liberation Serif Mono |
|
SIL Open Font License. |
6 USB driver (CSUD) Source
The source code for CSUD (Chadderz's Simple USB driver) used in the tutorials is available here: https://github.com/Chadderz121/csud.
Spot a mistake? You can help improve this tutorial on GitHub.

Baking Pi: Operating Systems Development by Alex Chadwick is licensed under a Creative Commons Attribution-ShareAlike 3.0 Unported License.
Based on contributions at https://github.com/chadderz121/bakingpi-www.