Face Detection
Difficulty: advanced
This tutorial builds on the blob detection and basic image processing tutorials. It introduces some advanced functionality in the Python image processing module and moves on to doing robot control, using objects detected from the webcam to guide it. It is helpful to have looked at the robot control tutorial before doing this tutorial.
REQUIREMENTS:
-
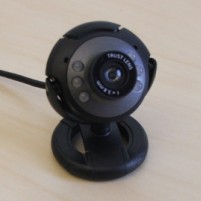 Webcam
 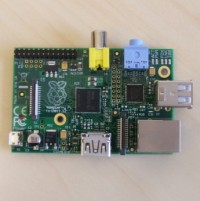 Raspberry Pi
For the extension:
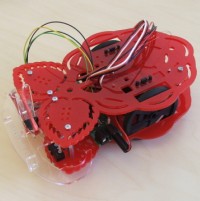 Robot chassis
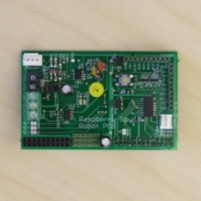 Custom Pi shield
-
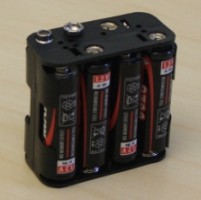 Battery pack
INSTRUCTIONS (part 1):
First of all create two separate scripts called ‘face_detect.py’ and ‘blob_detect.py’. These will be the scripts we will work on. Start by editing the face_detect.py script.
As usual import the image processing library, and create a Camera and Viewer object.
from imgproc import *

cam = Camera(160, 120)
view = Viewer(cam.width, cam.height, "Face detection")
We want to create an infinite loop, where we do the same work repeatedly until we quit with Ctrl-C.
while True:
Every time we loop, we want to grab an image from the camera and store it.
image = cam.grabImage()
Now is the interesting part. In the image processing module there is a function which is part of the Image class called detectFaces, this function takes the image as input, and searches for faces within it; when faces are found, their bounding rectangles are returned in a list of Python tuples. These tuples contain the x and y position of the match, and the width and height of its bounding rectangle.
faces = image.detectFaces()
faces will now contain a list of bounding rectangles of any found faces. Now we need to extract the information from faces. We can do this with a for loop.
for face in faces:
Each iteration of the loop, face will contain a new tuple representing a new matched face. Lets use the bounds returned by face to draw them onto the image.
    # extract the x, y, width and height from the tuple
    x, y, width, height = face

    # use the information to draw an purple rectangle around the face
    image.drawRect(x, y, width, height, 128, 0, 255)
Now, draw the image to the view, do this outside the for loop, but inside the while, so it’s still drawn every frame.
view.displayImage(image)
Run this program now, it should pick up your face in the frame and draw a purple bounding box around it.
Now the face detection is working, we’ll move onto doing blob detection. We’ll come back to the face detection later, when we look at controlling the robot.
Open blob_detect.py, this will be our blob detection script.
The blob detection tutorial goes through how the blob detection algorithm works under the hood, but it was too slow, and could only handle a single blob at a time. For the purpose of robot control, we will be using a bit more advanced blob detection which is already part of the image processing module. To use this we need another script of a similar format to our face detection one.
from imgproc import *

cam = Camera(160, 120)
view = Viewer(cam.width, cam.height, "Blob detection")

while True:
  image = cam.grabImage()
Now to detect blobs in the image we need to define the range of colours to filter out. To do this we will use a function called chromaKey(). This function takes red, green and blue intensity values, and a threshold as arguments. It treats the red, green and blue as axes on a 3D graph, and uses Pythagoras’ theorem to calculate the distance between the reference intensities and that of the current pixel. If the the distance is less than that of the threshold, then the pixel passes and is set white, otherwise the pixel is set black.
  # use the chroma key with the colour (160, 64, 64) and the threshold 96
  image.chromaKey(160, 64, 64, 96)
After applying the chroma key function, the provided image becomes black and white. If we want to draw to the original image later then we need to create a copy of it before applying the chroma key, like so:
  # create a copy of the original image for later
  image_copy = image.copy()
  # now apply the chroma key
  image.chromaKey(160, 64, 64, 96)
We will use the image copy later for drawing to the screen, but now we will use the now black and white original to detect blobs. The detectBlobs function works in much the same way as detectFaces, however as well as returning the x and y position and the width and height of the bounding rectangle, it also returns the number of pixels or ‘area’ the blob occupies.
  # detectBlobs returns a tuple of the x, y, width and height of the
  # bounds and the area in pixels of the blob
  blobs = image.detectBlobs()
From here we can iterate over every blob, get its bounding box, draw its bounds to the image copy, and then draw the image copy to the screen.
  for blob in blobs:
    # extract the blob's information
    x, y, width, height, area = blob

    # draw green bounding boxes around the blob on the image copy
    image_copy.drawRect(x, y, w, h, 0, 255, 0)

  # display the image copy on screen
  view.displayImage(image_copy)
The detectBlobs function has given us all of the continuous regions found in the image, including all of the ‘blobs’ made up of only a single pixel. Really we’re only interested in the biggest blob in the image, so we need to filter out all of the other blobs. As we loop across all of the found blobs, we’ll keep track of the biggest blob found so far, and by checking the area of each consecutive block against this one we can make sure that by the end we have the largest.
  # detect blobs in the image
  blobs = image.detectBlobs()

  # our current biggest
  largest_blob = None

  # the current biggest's area
  largest_blob_area = 0

  for blob in blobs:
    # extract the blob's information
    x, y, width, height, area = blob

    # check if the area is greater than the largest blob's
    if area > largest_blob_area:
      # area is greater, so the current blob is the new largest
      largest_blob = blob

      # set the largest area to the current blobs area
      largest_blob_area = area

  # check the largest_blob is set
  if largest_blob is not None:
    # extract largest blobs information
    x, y, width, height, area = largest_blob

    # draw a purple rectangle around it on the image copy
    image_copy.drawRect(x, y, width, height, 128, 0, 255)

  # display the image copy
  view.displayImage(image_copy)
Run this code to test it. It should pinpoint the single largest continuous blob in the image and draw a purple rectangle around it. If the blob detection does not appear to be working, display the image, rather than its copy to view the black and white version which is being used to find the blobs.
If you are really stuck, there is a code listing for this script here: face_detect.py
EXTENSION:
Here are some other things you may like to try at this stage:
- Eliminate long or thin objects from those detected. By checking the ratio of width to height of each blob you can find long objects when they are vertical or horizontal, but what about when the objects are at an angle?
- Remove any objects that are smaller than an absolute pixel area.
- Detect when the bounds of an object of one colour is inside the bounds of an object of another colour (e.g. a target made of concentric rings). This will require two chroma keys and two passes of blob detection.
INSTRUCTIONS (part 2):
In this final stage, we will use the newly detected faces and blobs to drive the robot. Create a new file called ‘chase.py’.
We need to include the normal libraries, and those necessary for the robot control.
from imgproc import *

# robot control module
import i2c

cam = Camera(160, 120)
view = Viewer(cam.width, cam.height, "Chase")
We will still create a viewer as it is useful for testing/debug while it is not connected to the robot. Next:
# create our robot control
robot = i2c.I2C()
For the next part, you may copy your code from either the face detection script you have written or your blob detection script. The blob finding code is used in this example.
The main part of code we are interested in for robot control is the bounds of the target object. We will use the largest object as a target, and then calculate the centre point.
  # initialisation and detection goes here
  ...
  # check the largest_blob is set
  if largest_blob is not None:
    # extract largest blob's information
    x, y, width, height, area = largest_blob

    # draw a purple rectangle around it on the image copy
    image_copy.drawRect(x, y, width, height, 128, 0, 255)

    # now extract the centre of the largest blob
    target_x = (x + x + width) / 2.0
    target_y = (y + y + width) / 2.0
(Note: it is important to write 2.0 instead of 2 otherwise Python will use integer division, which behaves differently.)
We have our target position in terms of its position in the image. For our robot though, this needs to be in terms of how far left or right of the image it is. Lets normalise the target position to the range -1.0 to +1.0, where -1.0 is on the far left of the screen and +1.0 is on the far right. It’s probably obvious now that the target_y position makes no difference to how far left or right on the screen the object is, so you can remove that line from your code.
Before normalising to -1.0 to +1.0 we will normalise to +0.0 to +1.0. Potential x positions range from 0.0 to image.width so we can do this by dividing by image.width.
    # normalise to the range +0.0 to +1.0
    target_direction = target_x / image.width
Now we will transform this to the range -0.5 to 0.5 by subtracting 0.5.
    # range -0.5 to +0.5
    target_direction -= 0.5
Finally we multiply by 2 to get the desired range -1.0 to 1.0.
    # range -1.0 to +1.0
    target_direction *= 2.0
Now target_direction is in a good format for controlling robots. For the setting of speed of the robot’s motors we use the function setSpeeds(). This takes the speeds of each wheel as parameters in the range -100 to +100. To begin with, we will make the robot point in the direction of the blob, turning in proportion to how far left or right the blob was in the image.
    # The speed scale of 100 corresponds to full speed
    # when the object is on the far left or right of the image
    speed_scale = 100.0

    left_speed = target_direction * scale_factor
    right_speed = - target_direction * scale_factor
Notice that in the above code, the right speed is set to the negative of the resultant speed. This is because when an object is on the far right, the target direction will be positive, but we want to be running the right motor backwards, not forwards.
Now is a good time to test out the code.
You will notice from testing the code that the robot simply turns on the spot. This is because we are simply settings the speeds the same in opposing directions. You will also notice the robot turns in proportion to how far left or right it is from the sight line of the camera, this means you get slow turns when there is a small angle between the robot and the object, and fast turns when it is near the edge of view.
To get the robot moving forwards as it turns, we need to add a constant speed factor. I have lowered the speed scale for this so that turning is not affected by the speeds exceeding +100.0, but you don’t have to.
    # scale factor for the speed
    speed_scale = 75.0
    # constant forward speed to add
    speed_const = 25.0

    # set the speeds
    left_speed = speed_const + (target_direction * speed_scale)
    right_speed = speed_const – (target_direction * speed_scale)

    # drive the motors
    robot.setSpeeds(left_speed, right_speed)
The final step is to make sure the robot motors are set to stopped when the script is exited. So place this line after the event handling while loop:
# finally, stop driving the motors
robot.setSpeeds(0,0)
This tutorial is now at an end. You can play around with the speed setting to find a good balance for turning or you can try and get the robot to follow your face. You can also find a code listing here if you are stuck: chase.py
