Blob Detection
Difficulty: intermediate
This tutorial builds on the basic image processing tutorial, using Python and the image processing module to find a blob of colour in an image.
REQUIREMENTS:
-
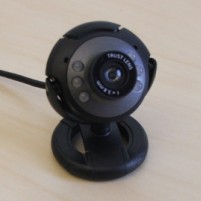 Webcam
 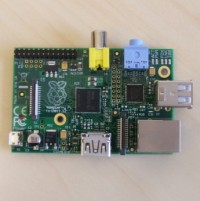 Raspberry Pi
INSTRUCTIONS:
To begin this tutorial, first create a file called blob.py. This will be the basis for our blob finding script. Once you have created the file, open it in a text editor.
As with the introduction tutorial, we will be using the image processing module, and we will need to initialise the window and the camera to capture images.
from imgproc import *

# Create a camera
cam = Camera(320, 240)

# use the camera's width and height to set the viewer size
view = Viewer(cam.width, cam.height, "Blob finding")
Now we have a viewer to draw images to, and a camera to capture images from. The next line we will add will be unfamiliar.
# endlessly loop until the user exits
while True:
This loop will be where we put the remainder of our script. The loop will continue to execute until the user terminates the program with Ctrl-C.
Next we will grab an image from the camera and display it.
  # grab an image from the camera
  image = cam.grabImage()

  # we will put our remaining code in here

  # display the image on the viewer
  view.displayImage(image)
Since these lines are within the while loop, it will endlessly grab images from the camera and display them on screen, until the user exits.
Run this script now to check there aren’t any syntax errors. It should create a window on screen and display a stream of images from the webcam. Close by pressing the escape key.
Our next aim is to try and detect a blob of colour in this image. Try and find something nearby which is bright green, red or blue. We will try to find this object in the image, by filtering out the other colours, then we will draw a marker in its centre.
First of all, we need to try and pinpoint the colour of our object, and filter out all of the others. We will do this by iterating over each pixel, and by testing its red, green and blue intensities against each other.
In the basic tutorial, we isolated predominantly red colours, so let’s start from there. Make sure you put this code after you grab the image from the camera, and before you display it. It should also be indented so it is part of the while loop.
for x in range(0, image.width):
  for y in range(0, image.height):
    # get the value of the current pixel
    red, green, blue = image[x, y]

    # check if the red intensity is greater than the green and blue
    if red > green and red > blue:
      # colour pixels which pass the test black
      image[x, y] = 0, 0, 0
The important line is the conditional
if red > green and red > blue:
By testing the intensity of the individual channels against each other in different ways we can pinpoint our desired colour. Here are some hints to help you try to pick out your colour:
# Test whether the green channel is more intense than 128 (half intensity)
if green > 128:

# Tests whether red is more than twice the intensity of the green channel
if red > (2 * green):

# Here we look for colours where the blue value is greater than 64
# and the blue is more than 3/2 times as intense as the green
if blue > 64 and blue > (3 / 2 * green):

# An alternative way of writing the above, by nesting if statements
if blue > 64:
  if blue > (3 / 2 * green):
    # code here
255 is the maximum value for a channel, but most of the time colours are much less intense than this. Start by filtering out very few pixels, and slowly narrow down the scope until you only have your coloured object remaining. You won’t be able to get rid of all of the noise, so don’t worry too much. Also a few images will be taken when the camera is not fully calibrated, so it will take a short time to stabilise. Keep trying until you get close.
You will probably notice as you’re testing that it takes a while for each new image to appear on screen. This is because testing every pixel in an image is a fairly slow operation. We can speed this up by operating on an image at a lower resolution. To do this change the sizes when we create the camera to a lower value.
cam = Camera(160, 120)
or
cam = Camera(80, 60)
This will make our window smaller, but for our purpose this is fine, and it means we have less pixels to traverse.
Hopefully now your object is being filtered out and drawn over in black. The next stage is to work out the centre of the black pixels. The way we will do this is to find the average position of all of the black pixels. You can choose any method of averaging you like; the mean is used in this example.
To calculate the mean, add up all of the items’ values and divide by the total number of items. In our case the ‘values’ are the x and y positions and the total is the number of black pixels.
We can do this fairly easily as we iterate over all of our pixels. We will accumulate the x and y positions as we go, and increment a count of the number of black pixels. At the end we can then divide the accumulated x and y values by the total number to get the mean x and mean y positions, which represent the centre of our blob.
Here is the structure of the code to do this.
First we need to create the variables. They need to be initialised every time the loop runs, so put this just after the opening of the while.
while True:
  # x and y position accumulators
  acc_x = 0
  acc_y = 0

  # number of pixels accumulated
  acc_count = 0

  # iterate over every pixel
  …
Now, whenever we pinpoint a pixel of our objects colour, we need to add to these variables’ values.
For each pixel:
# replace this with your pixel test
if red > green and red > blue:
  # add the x and y of the found pixel to the accumulators
  acc_x += x
  acc_y += y
  # increment the accumulated pixels' count
  acc_count += 1
  # change the pixel colour to black here
  image[x, y] = 0, 0, 0
By the end of the pixel iteration, we will have accumulated the number of pixels and their x and y co-ordinates. The final step is to calculate the centre point and draw a small cross there. Remember to do this before you display the image.
# check the count accumulator is greater than zero, to avoid dividing by zero
if acc_count > 0:
  # calculate the mean x and y positions
  mean_x = acc_x / acc_count
  mean_y = acc_y / acc_count

  # draw a small cross in red at the mean position
  image[mean_x + 0, mean_y - 1] = 255, 0, 0
  image[mean_x – 1, mean_y + 0] = 255, 0, 0
  image[mean_x + 0, mean_y + 0] = 255, 0, 0
  image[mean_x + 1, mean_y + 0] = 255, 0, 0
  image[mean_x + 0, mean_y + 1] = 255, 0, 0
Run this program, and it will find the centre of the colour of your object, and draw a red cross over it.
This marks the end of this tutorial. In later tutorials we will use more powerful functionality to do faster, and more complex detection and processing. If you wish to play around, there is documentation of the module and its functions. A complete listing of the code for this tutorial can be found here.
EXTENSION: Robot Chase
Try using the position of the blob to control which direction the robot should move in. (See robot control tutorial for more details.) If the blob is to the left of the centre of the image, the robot’s left wheel should move slower, and vice versa. You should be able to get the robot to chase a brightly-coloured object that you hold in front of it, or even an LED on another robot!
