Time to learn a bit about hardware/software codesign! In this workshop you will writing both a small program for the ARM, as well as reusing and modifying some of the Verilog you have written in previous workshops. The work is split into two tasks to help you build up the hardware and software in stages.
Your first task is to interface the ARM to the 7-segment LEDs controlled by the FLEX. This will be used in Task 2 to display mouse data, but for this task you could just display an incrementing number. The FLEX chip has been allocated a chunk of the ARM's address space and so it needs to act like an memory device to allow the ARM to write data to it. In Task 2 the FLEX will also allow the ARM to read data from it.
You need to write some Verilog code for the FLEX to latch data written by the ARM, decode the data (using the HexToLEDs module from previous workshops) and output the hex digits on the LEDs.
To make the FLEX respond to write requests from the ARM, you will need to:
Hint: you only need a combinational function (i.e. no latches/registers required) between the nCE2 and nWE wires and the enable_data_out wire (i.e. use continuous assignment).
Pin definitions for the FLEX chip are in lab6.acf. To get you started with your Verilog code, below is a suitable header including the mouse interface and data output bits needed for Task 2 (which you can ignore for now) and the tristate buffer for nWAIT mentioned above:
module lab6(ledA, ledB, mdata, mclk, d, a, XCLK, nCE2, nOE, nWE, INT4, nWAIT);

  output [7:0] ledA, ledB;           // 8-bit outputs to LEDs
  inout  mdata, mclk;                // mouse serial interface
  inout  [7:0] d;                    // bidirectional data bus
  input  [7:0] a;                    // address bus
  input  XCLK, nCE2, nOE, nWE;       // clock and memory bus control
  output INT4;                       // interrupt 4 line
  inout  nWAIT;                      // bidirectional memory timing control

  TRI    tbuf_for_nWAIT(1,0,nWAIT);  // make nWAIT tristate
  wire   [7:0] data_out=0;           // zero data output to ARM for now
  wire   enable_data_out=0;          // don't output data to ARM for now
  TRI    tbuf_for_D0(data_out[0],enable_data_out,d[0]);
  TRI    tbuf_for_D1(data_out[1],enable_data_out,d[1]);
  TRI    tbuf_for_D2(data_out[2],enable_data_out,d[2]);
  TRI    tbuf_for_D3(data_out[3],enable_data_out,d[3]);
  TRI    tbuf_for_D4(data_out[4],enable_data_out,d[4]);
  TRI    tbuf_for_D5(data_out[5],enable_data_out,d[5]);
  TRI    tbuf_for_D6(data_out[6],enable_data_out,d[6]);
  TRI    tbuf_for_D7(data_out[7],enable_data_out,d[7]);
  assign INT4=0;                     // disable interrupts for now
  assign mdata=1'bz;                 // don't use mouse data for now (tristate)
  assign mclk=1'bz;                  // don't use mouse clock for now (tristate)
...
Write an accompanying piece of ARM assembler to write values to the LEDs. The ARM to FLEX data bus is just 8-bits wide so use the strb instruction to store a byte to the FLEX since a str instruction will result in 4 bytes being written. The FLEX chip is memory mapped onto the ARMs memory map over the area 0x08000000 to 0x0bffffff. Since the FLEX is only fed the first 8 address lines, only addresses 0x08000000 to 0x080000ff are useful, the higher addresses mapping onto the lower ones (e.g. 0x08000103 looks the same as 0x08000003 to the FLEX).
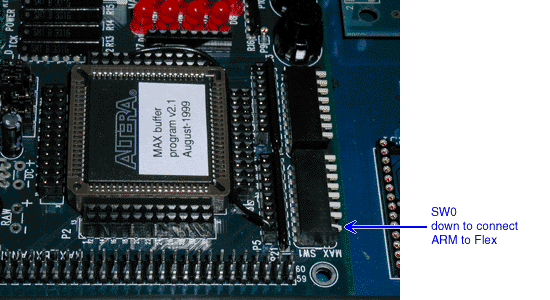
For more detail on the interface between the FLEX and the ARM, see memo 21.
The task for this workshop is to interface the mouse to the ARM in such a way that pressing either mouse button causes the ARM to print the current "position" of the mouse in the debugger. The position should be an X,Y pair where X and Y are both signed 16 bit numbers. The lower 8 bits of the X value should be displayed on the 7-segment LEDs when a mouse button is pressed. If both mouse buttons are pressed simultaneously then the program should terminate.
This task should build on task 1, i.e. the ARM should write the value to be dispalyed to the FLEX and therefore if the ARM is kept in a reset state the display should not be updated.
To do this you will need:
The program should only print the X and Y values when the buttons are first pressed, not while they are held down.
To allow the ARM to read data from the FLEX, you will need to:
TRI tribuf0(my_data[0],enable_data_out,d[0]);
See Help | Primitives ... | TRI in MAX+Plus II for
a description of the TRI state module.
assign enable_data_out = !nOE && (your equations here);
Note that the ARM is configured to treat this bus as 8 bits wide so if you use ldr to load a 32 bit word the ARM will to four 8 bit reads on your behalf.
Hint: to multiplex a set of buses together you can use the `?' operator multiple times, e.g.:
        assign data_out = (select_bus == 2'd0) ? bus0 :
                          (select_bus == 2'd1) ? bus1 :
                          (select_bus == 2'd2) ? bus2 : bus3;
The bonus task is optional, but if you have time it would be a good idea to tackle it because you will learn more about interrupts and interrupt handlers.
When running code from Task 2 it is possible for events to lost if you hit mouse buttons too quickly (particularly if you reconfigure the remote debugging to use 9600 baud rather than 38400 baud). This is due to the ARM being busy sending output to the console over the serial line which prevents your polling code from checking for new mouse data. The solution we will adopt here is to write an interrupt handler to buffer data sent by the FLEX so that nothing is lost (unless the buffer overflows!). The FLEX should interrupt the ARM whenever new mouse data is available, and the ARM should buffer mouse events by placing them in a circular FIFO. A user mode routine should check the FIFO and print out data as before (i.e. every time a mouse button down event is noticed). Since interrupts can still be handled whilst data is being sent to the console, mouse events should be safely buffered and none should be lost.
Before writing the interrupt handler to implement the buffer, try writing a simpler interrupt handler to just display the mouse buttons on the ARM's four status LEDs. The LEDs can be written to by storing a byte, containing the appropriate bits in the top nibble, to address: 0xffff1c08
The Angle debugger (the code that sits on the ARM board and communicates with the debugger code running on the PC) uses the normal interrupt line (INT) but the fast interrupt line (FIQ) is available for our use. FIQ has the advantage that extra registers are available (r8-r13) so for simple routines (like this one) there is no need to save any state to free up registers. Just don't use (r0-r7) because they are shared with the user mode code so would have to be saved before use.
The SHARP LH77790B chip contains an interrupt controller as well as an ARM core and other peripherals. The FLEX chip is connected to the interrupt controller via external interrupt line 4 (INT4 on the FLEX, CH4 on the interrupt controller). The following routines enable and disable FIQs from the FLEX.
	;; turn on external interrupt 4 line (ch4 to interrupt controller)
	;; enter with r0=address of your interrupt handler
int4on
	;; make FIQ vector point to your interrupt handler
	mov	r1,#0x3c
	str	r0,[r1]

	;; tell FLEX chip to cancel interrupt
	ldr	r0,[pc,#(FLEXintCtl-8-.)]	; get FLEX base address
	ldrb	r0,[r0]				; clear interrupt flag on FLEX

	;; configure the interrupt controller
	ldr	r0,[pc,#(intControllerRegs-8-.)] ; get base address of interrupt controller
	mov	r1,#0x55	; set all external inputs to active high
	orr	r1,r1,r1,LSL#8	; r1=0x5555
	str	r1,[r0]         ; write ICR0 (interrupt control register 0)

	mov	r1,#0x010	; enable just ch4
	str	r1,[r0,#0x10]	; write FIQER (FIQ enable register)

	mov	pc,lr		; return from subroutine


	;; turn off external interrupt 4 line (ch4 to interrupt controller)
int4off
	ldr	r0,[pc,#(intControllerRegs-8-.)]
	mov	r1,#0		; clear all FIQ enables
	str	r1,[r0,#0x10]	; write FIQER

	mov	pc,lr		; return from subroutine


intControllerRegs
	DCD	0xffffa800	; start of interrupt controller registers
FLEXadr
	DCD	0x08000000
FLEXintCtl
	DCD	0x08000010      ; address for clearing the FLEX interrupt
The int4on routine sets up the FIQ interrupt vector to point to a routine whose address you pass in r0. FIQs are turned off with int4off. Obviously you need to write the interrupt handler.
Return from an interrupt requires:
subs pc,lr,#4
4 has to be subtracted from the lr because the pc is incremented before the interrupt is taken, so the lr didn't receive the desired value. The "s" flag is required because in this particular circumstance it causes the mode bits to be swapped from FIQ mode to user mode.
Notice that in int4on there is a section of code which tells the FLEX chip to clear interrupts. Your interrupt handler must also clear the interrupt signal from the FLEX chip.
You need to add some Verilog to your design for Task 2 to control interrupts. When new data has been received from the mouse you need to raise the INT4 output. Your ARM code then clears this signal when it enters the interrupt handler, e.g. by reading from address 0x08000010 (which is the address used in the code above). So your Verilog code needs to decode this address and clear the INT4 signal as appropriate.
Once you've finished - congratulations! You've designed a device and written a device driver.
//////////////////////////////////////////////////////////////////////////////
// ECAD+Arch Workshop 6
//
// Your name
// Your college
// date
//////////////////////////////////////////////////////////////////////////////