|
After downloading and unpacking the XenoClient distribution, you
can start using the XenoClient tool. The tool presents a graphical
interface (GUI) and allows you to:
To deploy sessions on XenoServers using the XenoClient tool, please
follow steps 1-6 as below. To manage, destroy, and suspend or resume
sessions, look at steps 7 and 8.
Step 1 - Starting the tool
To start the XenoClient tool, cd
to your XenoClient directory and execute the xenoclient
script:
cd xenoclient-VERSION
./xenoclient
Step 2 - Registering
If you are starting the client for the first time, a dialog will
come up asking you whether you want to register. It is necessary
that you register with XenoCorp to use the platform, so please click
"yes" when you see the following window:

This will start the registration process, bringing up a window
similar to the one below.
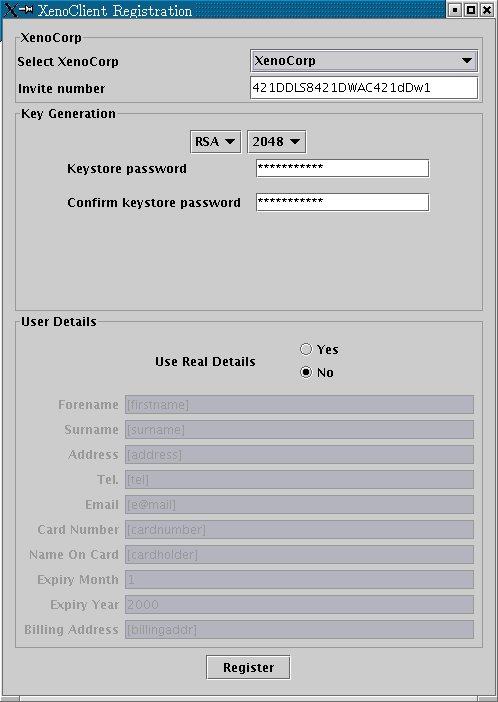
Please select the XenoCorp you want to register with from
the drop-down menu at the top of the page. Please type in the invite
number you've been given in the corresponding text field; participation
in the XenoServer platform is (at this stage) by invitation only.
If you have not been given an invite number and would like to obtain
one, or if your invite number does not work, please contact
us.
At this stage you are asked to provide a password for the
XenoClient's keys. This is important; make sure you remember your
password as you will need it every time you start your client in
the future. Also, please fill in the user details section
with your personal details. Once you are finished, click "register".
IMPORTANT: Do not type in
real credit card details, as the platform's security is still
under monitoring and development. At this stage you will not need
any real money to use the platform.
When registration is finished, you will see the following pop-up
window.
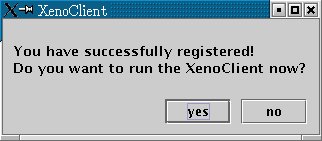
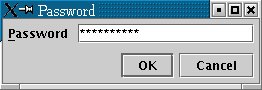
Clicking "yes" will bring up the following window, requesting
your keystore password (the one you typed in when registering).
Please type in your password and click "ok".
After a few seconds XenoClient will be started.
Step 3- Creating a purchase order
As soon as XenoClient is started, you will be presented with the
following screen:
.jpg)
Click on "Create order" and enter an arbitrary amount
(anything in the tens of thousands would do). You should now be
able to see your newly created purchase order, as below:
.jpg)
Step 4 - Creating a service configuration
Click on the "deploy & manage" tab. Notice that there
are no service configurations or sessions created yet. Now select
the menu File, New and click on Service, as shown
below.
.jpg)
You are now able to define the deployment parameters of the session(s)
you wish to deploy with the specific service configuration you are
creating; you can create more service configurations in the future.
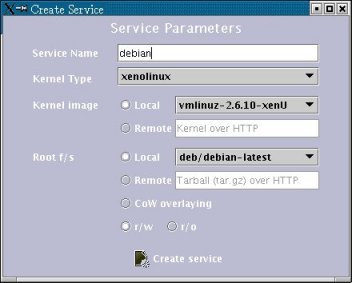
The fields you need to fill in are:
- Service name: the name you want to use for referring
to this service, e.g ."test-debian".
- Kernel type: the type of the VM in which you will deploy
your services (e.g. xenolinux, xenobsd). Currently only xenolinux
is supported.
- Kernel image: the operating system kernel for booting
the VM. This can be either one of the common images that are persistently
cached on all XenoServers (e.g. vmlinuz-2.6.10-xenU), or your
own kernel. To use your own kernel put it somewhere on the web,
select "Remote", and type in the HTTP location (URL)
where your kernel can be found.
- Root f/s: the root file-system for your new VM. This
can be either a copy of the common template file-systems that
are persistently cached on all XenoServers (e.g. debian-latest),
or your own file-system. To use your own file-system put it somewhere
on the web, select "Remote", and type in the HTTP location
(URL) where your file-system can be found (your file-system needs
to be in .tar.gz
or .tgz form).
You can also specify whether you want your root f/s to be mounted
read/write or read/only.
Once you are done with filling in all required fields, please click
on "create service". You should now be able to see the
service you created in the list of available services on the left
hand side.
Step 5 - Creating sessions
To create one or more sessions, select the menu File, New and
click on Sessions, as shown below.
.jpg)
This will start the session creation wizard, as below. Click "next".
.jpg)
This brings you to the server selection screen, as shown below.
XenoClient has automatically discovered the currently available
XenoServers; you can choose one or more servers on which the new
session(s) will be created. When you have selected the server(s)
click "next".
.jpg)
You now have to select the purchae order that will be used to fund
the new sessions. To do this, select one of the available orders
from the combo box -- you can see a summary of each order's balance
and other properties at the bottom of the page. When you have selected
a purchase order, click "next".
.jpg)
You now have to select the service configuration that will be used
for the session(s) you are about to create (specifying e.g. the
kernel, root file-system, and type of VM to be used). To do this,
select one of the available service configurations from the combo
box -- you can see a summary of each service's parameters at the
bottom of the page. When you have selected a service, click "next".
.jpg)
You now have to select the resources that will be used for the
session(s) you are about to create (specifying e.g. how much CPU,
memory, network bandwidth, and IP addresses or ports will be reserved
for your VM). To buy some amount of an available resource you have
to select it and click "change qty". You will then be
prompted for the quantity you wish to purchase. Do this until you
have selected all resources your VM will require. When you are done
buying resources, click "finish".
NOTE: you have to buy at least some amount of memory and
CPU for your VM to be functional. If you do not purchase
any external network access to your VM (either an IP address or
a port) then the VM will only be accessible by its link-local address.
.jpg)
At this point you have created one or more sessions, which are
queued on the XenoClient, waiting for you to start them.
Step 6 - Starting sessions
The deployment & management pane should appear as below --
the session(s) you created just before appear and their status is
queued. To start one or more sessions, select them and click "start".
The "clone" facility allows you to spawn copies of the
session configuration you just created for ease of multiple and
parallel deployment.
.jpg)
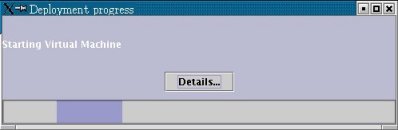
You should now see a "deployment progress" window for
every session start-up you have requested. A deployment progress
window, like the one below, gives you feedback on the current stage
of the session start-up progress and on the previous stages (if
you click on "details").
Once your session is successfully started, or in the event an error
has occured, you will receive a pop-up notification. If the session
was started successfully, your new VM(s) should be up and available
for use on the selected XenoServer(s).
Step 7 - Feedback and interaction with sessions
Bidirectional console
After you have started one or more sessions, you can use the XenoClient's
bidirectional console to access the corresponding VMs and carry
out fine-grained environment configuration or deploy your services.
This can be done by clicking on the "VM consoles" tab,
and then on the tab corresponding to the session you want to connect
to. The console window of a session should appear as below.
.jpg)
Pinging sessions
Also, from the deployment & management tab, you can obtain
information on the current status of your VMs, the resource usage
incurred by each one, and the associated costs and charges. To do
this, select one or more sessions, and click on "ping".
The results of a ping are shown below.
.jpg)
If your VM is so configured - and if you have purchased external
network access - you should be able to connect to it via ssh. We
recommend using ssh over the XenoClient's console for long-term
connections.
You can also attach a new purchase order to a running session by
selecting the menu Sessions, Attach new order.
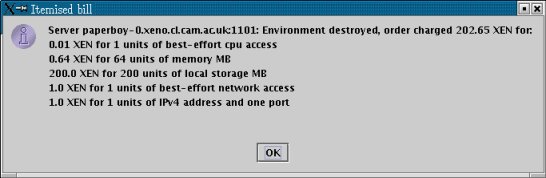
Step 8 - Destroying and suspending your sessions
Destroying sessions
You can stop or suspend a session whose status is "alive"
at any time - destroying a "queued", "dead",
or "suspended" session simply removes it from the XenoClient's
state. To do this, select the session you intend to destroy and
click on "destroy". The result of a successful session
destruction is its removal from the deployment & management
GUI, and a pop-up window like the one below informing you of the
incurred charges.
Suspending and resuming sessions
A session that is "alive" can be suspended; this saves
the VM's memory image to a file, and allows for very quick resumption
of the VM's operation at a later stage. To suspend a VM, select
the menu Sessions, Suspend to file. You will be prompted
to select whether you would like to receive a copy of the VM's image,
to store locally on your machine. We recommend that you do this,
to ensure long-term image availability.
After you receive the image file, the session's status will change
to "suspended". Selecting a suspended session and clicking
on "start" will resume the session from the selected memory
image file.
|