Buttons and Switches
Difficulty: beginner
This tutorial will help you to receive input to your Pi from physical switches and buttons and to debounce if necessary. It will show you how to automatically run a program when a button is pressed (a GO button for a robot, for instance), or use it as part of your program.
REQUIREMENTS:
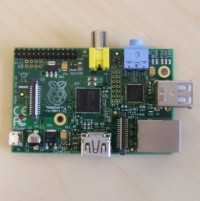 Raspberry Pi
 Ribbon cable
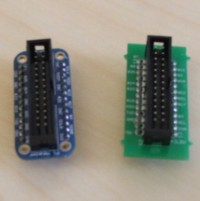 Breakout board
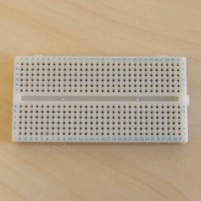 Breadboard
 Jumper wires
-
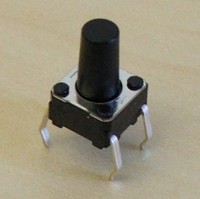 Button or switch
  1kΩ and 10kΩ resistor
BACKGROUND:
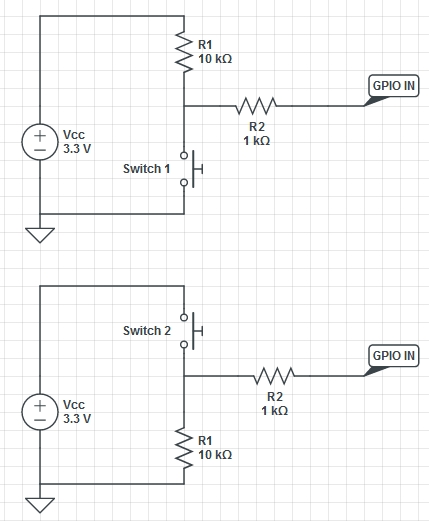 Circuit with current-limiting resistors in place. Diagram from eLinux.
When a GPIO pin is set as an input it is “floating” and has no defined voltage level. For us to be able to reliably detect whether the input is high or low we need to tie it so that it is always connected and either reads high or low.
To tie the pin we connect either a Pull Up or Pull Down resistor. A Pull down resistor connects the pin to ground through a large resistor, this means that when the switch is open there is a path to ground and so it will read low. When the switch is pressed (with the other side connected to 3.3V) there is a lower resistance path to high and so the pin will read high. The large (10kΩ) resistor ensures that only a little current is drawn when the switch is pressed.
Setting up a circuit like this means that we will be able to take reliable readings from a switch, however we could still damage the pins if they are accidentally set to an output. If we drive it low the output is connected directly to ground. Pushing the button will then create a short circuit between 3.3V and ground! To make this safer we put in a current limiting resistor (1kΩ will do) to make sure the Pi can handle the current drawn.
INSTRUCTIONS:
It is recommended to use one of our SD cards or images, if you are not you will need to install the RPi.GPIO library.
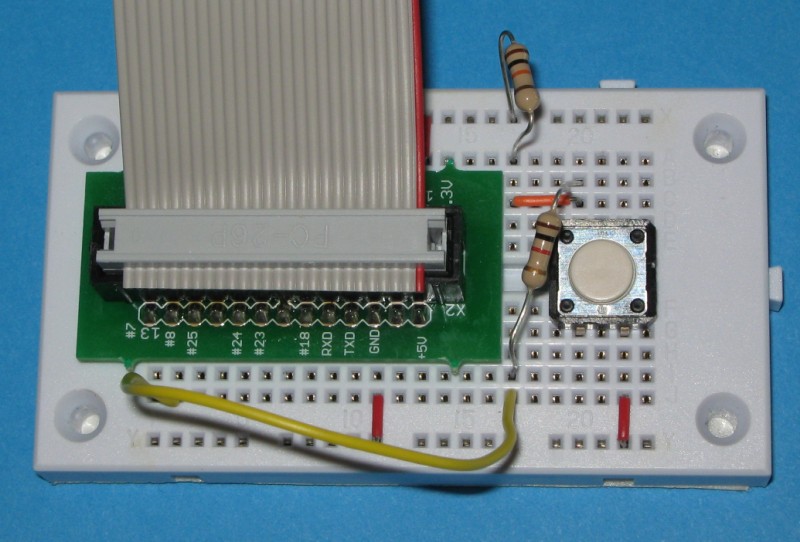
Now that we know what we need to do, we can get things wired up. First you should try to identify how your switch works, i.e. how the pins are connected. A simple switch may only have 2 pins and so be very easy to use, however if the one you wish to use is more complicated you can either look for a schematic (sometimes even on the switch itself) or test it with a multimeter. Look to see how the resistance changes between different pairs of pins when the switch is in its different positions.
An example circuit is given in the image below:
With your switch connected, let’s now look at how to read its state from Python. Start Python (as root so you can access the GPIO pins) with
sudo python
In your Python console:
import RPi.GPIO as GPIO
GPIO.setmode(GPIO.BCM)
This will import the necessary libraries in the GPIO namespace and set the pin numbering to correspond to your breakout board.
Now we need to set the pin as input, pin 17 is used in this example.
GPIO.setup(17,GPIO.IN)
Reading the pin is now as easy as:
input = GPIO.input(17)
If we want to print “Button Pressed” each time a button is pressed (and assuming we’ve set up the switch so the pin goes high when pressed):
while True:
  if (GPIO.input(17)):
    print("Button Pressed")
Easy, right?
But wait… if you tried that, you probably noticed it printed many times for just a single press. This may sometimes be what you want if you’re monitoring something which changes state continuously, but for a button we’re probably only interested in seeing each press as one event.
This means we’re only interested when our switch changes from being low to being high, A little extra problem will be that this will actually happen several times in a very brief period for a button press, as the inside of the switch will act like a tiny spring. This is called bouncing.
import time
#initialise a previous input variable to 0 (assume button not pressed last)
prev_input = 0
while True:
  #take a reading
  input = GPIO.input(17)
  #if the last reading was low and this one high, print
  if ((not prev_input) and input):
    print("Button pressed")
  #update previous input
  prev_input = input
  #slight pause to debounce
  time.sleep(0.05)
Now we’ll write a very simple script that will be started at boot and run a program (start.py) when the button is pressed. This example calls the script run.py.
import RPi.GPIO as GPIO
import time
import os

#adjust for where your switch is connected
buttonPin = 17
GPIO.setmode(GPIO.BCM)
GPIO.setup(buttonPin,GPIO.IN)

while True:
  #assuming the script to call is long enough we can ignore bouncing
  if (GPIO.input(buttonPin)):
    #this is the script that will be called (as root)
    os.system("python /home/pi/start.py")
That’s it! Test it out by running it with sudo python run.py. If everything works as expected, let’s have it run at boot. It would be nice to have some indicator of if this program has yet run or called the script so if you’ve been though the Morse code tutorial (or had a look at the cheat sheet) you might like to add a status LED.
We need to edit /etc/rc.local (as root since this is the owner).
sudo nano /etc/rc.local
At the bottom, just above exit 0 we’ll add a call to our script.
python /home/pi/run.py
Great! Now every time you boot, you’ll have a listener program waiting that can start another program. This is good if you need a way to start your robot with no keyboard or mouse, but want it to wait before doing anything. This gives the advantage over waiting for a button press in the program itself that another press will reload the program after it quits (or crashes!).
Here’s an example of a run.py suitable for Pis with our shield on that flashes an LED while waiting for the button to be pressed.
EXTENSION: Control the Physical World
Using our LED tutorial, set up a system where pressing a button changes the state of one or more LEDs. You could make it so a button behaves more like a toggle-switch, or set up a binary counter which counts up whenever the button is pressed.
